
Creating a URL job
This document outlines the steps needed to successfully create a URL job through the Hub.
- Login to your Datashake dashboard using your credentials.
Navigate to the "Hub" section from the menu.

Click "+ Add Job" to initiate a new job once on the Hub.

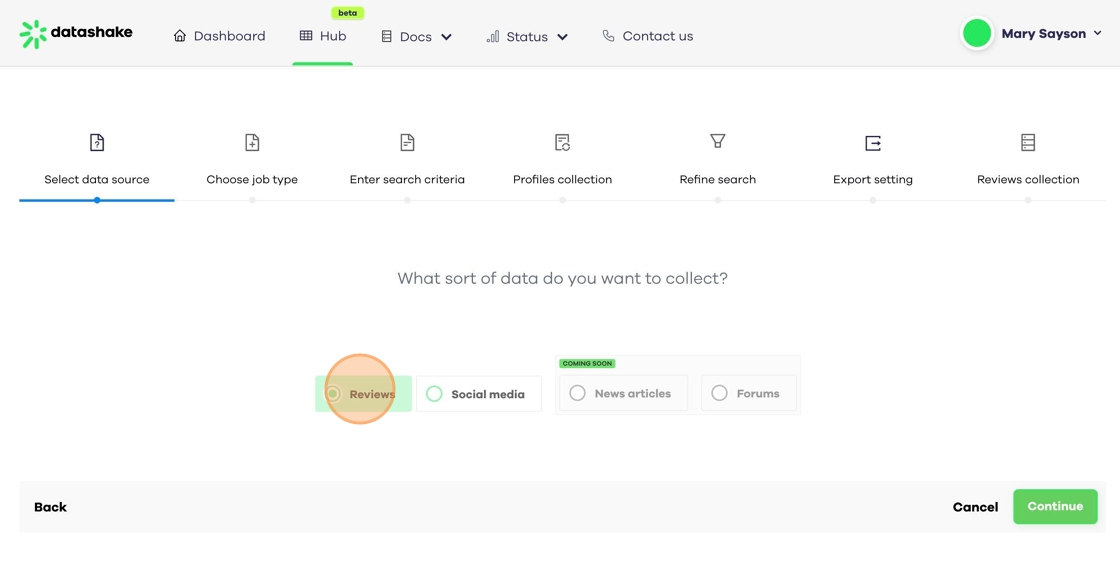
Choose your data source. Currently, only review data is available. Select "Reviews" and click "Continue."


Click "URL" to collect reviews based on your specific URLs and click "Continue." Reminder, a subscription to the Review Scraper API is needed when using this option.


Set a name for your job, the frequency, and how far back in time you want to go in retrieving the reviews.

- Specify how you want to upload the URLs. Reminder, always follow Datashake's URL guidelines when adding the URLs.
- Use "URL" to individually add up to 10 URLs. To do this:
Click "URLs."

Enter each URL in the "Insert a URL" field, and click "+ Add URL." A green check will appear if the URL added matches Datashake's URL guidelines. Otherwise, an "Invalid URL format" or "URL is not supported" with a red exclamation sign will show up indicating that the URL provided is invalid or currently not supported.
Please remember to add only one URL per box. Refer to the screenshot below for guidance.

Indicates a valid URL 
Indicates an unsupported URL Once all URLs are added, click "Continue" and proceed to Step 8.

- Use "CSV list" to upload a bulk list of URLs. To do this:
Click "CSV list"

Upload the list of URLs you want to collect the review from in CSV format. Make sure the URLs on your CSV are aligned with our Datashake URL guidelines. For maximum compatibility, download our suggested CSV template using the "Download CSV Template" button.

Drop your CSV file on the upload CSV file field or click the "Browse to Upload" link to search for your file.

Once the file is uploaded, click "Continue" and proceed to Step 8.

- Use "URL" to individually add up to 10 URLs. To do this:
Select how you would like to export your review data. Click the "+ Add export option" to choose from the available integrations or export options and enter the necessary details or credentials to connect to your preferred integration.
Reminders:
• Always double-check your integration details when using export options other than CSV to prevent errors. Typographical errors on the integration credentials can cause the job to fail.
• If no export option is selected, the job will be placed in "Draft" status and will remain inactive until an integration is added.
You can also contact our sales team at sales@datashake.com if you wish to add more integration.

Click the Add export option to see the available integrations 
This is the list of the available export options Once your integration has been set up, click "Continue" to proceed.

A pop-up to remind you about the credit consumption will be displayed. Click "Go Back" to modify your search or "Continue" to proceed. Always make sure you have sufficient Review Scraper API credits to prevent your job from failing.

The system will begin the review data collection based on your URLs. This can take anywhere from minutes to hours, depending on the number of reviews available for your URL. Click "Back to Hub" to return to Hub's home page where you will see the list of your jobs and their status.

Once the review collection is complete, the job status on the Hub's homepage will change to "Completed" and the review data should be visible on your integrated platform.


For CSV, you can click on the CSV icon in the "Integrated with" column to download the CSV file.
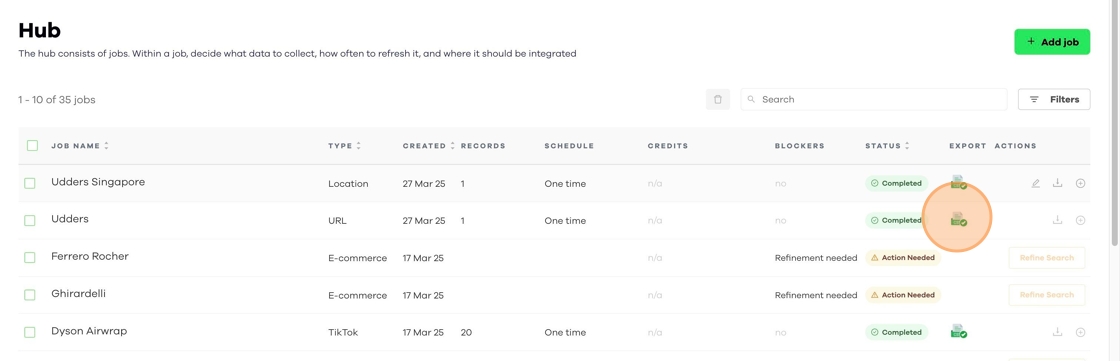
Click the CSV icon to open the completed job 
Click the Download CSV file button to download the review data via CSV


Note:
• The initial review collection during job creation can take up to 24 hours.
• If you've set up recurring review collection, the new data will be automatically gathered and added to your integration at your chosen frequency.
Visit the next article to learn more: